iOS Dev: Customize Space Between Sections in TableView

To adapt the space between sections of a grouped table view with more than one sections, you need to implement/override the following four methods in the implementation class which is derived from UITableView or UITableViewDelegate.

-(CGFloat)tableView:(UITableView*)tableView heightForHeaderInSection:(NSInteger)section
{
     return 2.0;
}

-(CGFloat)tableView:(UITableView*)tableView heightForFooterInSection:(NSInteger)section
{
     return 2.0;
}

-(UIView*)tableView:(UITableView*)tableView viewForHeaderInSection:(NSInteger)section
{
     return [[[UIView alloc] initWithFrame:CGRectZero] autorelease];
}

-(UIView*)tableView:(UITableView*)tableView viewForFooterInSection:(NSInteger)section
{
     return [[[UIView alloc] initWithFrame:CGRectZero] autorelease];
}

There also works

tableView.sectionHeaderHeight = 2.0;
tableView.sectionFooterHeight = 2.0;

for SDK versions lower than 4.0.

iOS Dev: Validate an eMail Address with Objective-C

NSRegExpression is part of the iOS SDK since version 4.0. Developers which using an older SDK ( XCode 4.0 is only available for MAC OS X 10.7 and higher) need to implement external libraries. I was not satisfied with such external libraries. For that reason, I searched for alternatives and figured out a good way by using NSPredicate to validate email addresses.

/*
*  Validates an eMail Address.
*/
- (BOOL) emailValidation: (NSString *) emailToValidate {
NSString *regexForEmailAddress = @"[A-Z0-9a-z._%+-]+@[A-Za-z0-9.-]+\\.[A-Za-z]{2,4}";
NSPredicate *emailValidation = [NSPredicate predicateWithFormat:@"SELF MATCHES %@",regexForEmailAddress];
return [emailValidation evaluateWithObject:emailToValidate];
}

BOOL can be 0 (false) or 1 (true). So, if you want to compare the result you need to do something like this

if([utils emailValidation] == 1) { //true

iOS Dev: How to implement an UIDatePicker?

The UIDatePicker feature is a very useful feature for providing date selection for users. This short tutorial shows how to implement such an UIDatePicker.

1) Declare an IBOutlet UIDatePicker variable and an IBAction method in your view controller interface class.

IBOutlet UIDatePicker *mypicker;
-(IBAction)outputDate:(id)sender;


2) Open the interface builder, drag and dop an
UIDatePicker to your view and connect it with the mypicker instance.

3) Add the following code snippet to viewDidLoad method in your view controller’s implementation class:

[picker setDate:[NSDate date] animated:YES]

This will set up the date picker with the today’s date and the current time when the view did load.

4) Finally, overwrite the defined method showdate in your inplementation class and add the following code:

-(IBAction)showdate:(id)sender{
NSDate *selectedDate = [mypicker date];
NSLog(@"Selected Date and Time: %@", selected);
}

iOS Dev: Customize UITextField and UITextView

iOs standardly provides four different styles for a text field or a text view which not always satisfying the need for an app. However, it is very easy to custom your own input field styles using CALayer class. I will show up how to get input fields like those in the screen shot below which contains out of an UITextField (Email) and an editable UITextView.

To get such a result, you need to declare all your UI variables into a interface class and synthesize them into the implementation class. Now, you can both – UITextField and UITextView – customize with the following code programmtically.

[[eMailMessage layer] setBorderColor:[[UIColor grayColor] CGColor]]; //border color
[[eMailMessage layer] setBackgroundColor:[[UIColor whiteColor] CGColor]]; //background color
[[eMailMessage layer] setBorderWidth:1.5]; // border width
[[eMailMessage layer] setCornerRadius:5]; // radius of rounded corners
[eMailMessage setClipsToBounds: YES]; //clip text within the bounds

There are some more CALayer variables you can set individually. Just look to CALayer class reference to find the customization methods for your need.

Note: You need to import  #import “QuartzCore/QuartzCore.h” into the implementation class to use the layer properties, otherwise the methods are not found.

iOS Dev: Customize ActivityIndicatorView

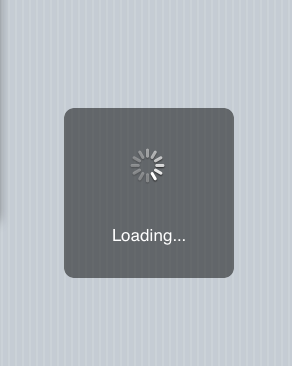
In my previous tutorial, I have showed how to implement a simple activity indicator view. This tutorial shows how to extend the SDK’s standard activity indicator by a rounded view which contains the activity indicator view and a text label that looks like the following example:
How To

1) First, declare a UIActivityIndicatorView, a UIView and a UILabel instance in the interface class of the view controller in where you want to implement the custom activity indicator.

@interface RootViewController : UIViewController {
    UIActivityIndicatorView *activityView;
    UIView *loadingView;
    UILabel *loadingLabel;
}

@property (nonatomic, retain) UIActivityIndicatorView * activityView;
@property (nonatomic, retain) UIView *loadingView;
@property (nonatomic, retain) UILabel *loadingLabel;

2) Second, synthesize all three variables into the implementation class and add the following code into the viewDidLoad method:

- (void)viewDidLoad {
     [super viewDidLoad];

     loadingView = [[UIView alloc] initWithFrame:CGRectMake(75, 155, 170, 170)];
     loadingView.backgroundColor = [UIColor colorWithRed:0 green:0 blue:0 alpha:0.5];
     loadingView.clipsToBounds = YES;
     loadingView.layer.cornerRadius = 10.0;

     activityView = [[UIActivityIndicatorView alloc] initWithActivityIndicatorStyle:UIActivityIndicatorViewStyleWhiteLarge];
     activityView.frame = CGRectMake(65, 40, activityView.bounds.size.width, activityView.bounds.size.height);
    [loadingView addSubview:activityView];

    loadingLabel = [[UILabel alloc] initWithFrame:CGRectMake(20, 115, 130, 22)];
    loadingLabel.backgroundColor = [UIColor clearColor];
    loadingLabel.textColor = [UIColor whiteColor];
    loadingLabel.adjustsFontSizeToFitWidth = YES;
    loadingLabel.textAlignment = UITextAlignmentCenter;
    loadingLabel.text = @"Loading...";
    [loadingView addSubview:loadingLabel];

    [self.view addSubview:loadingView];
    [activityView startAnimating];
}

Since I am fan of learing by doing, I will cover the above code on the surface and not in detail. At first, the loading view is initialized and configured with size and rounded corners. It forms the darkend part in which the activity indicator and the text label appears. Next, the activity view is initialized, configured and added as sub view to the loading view. Same holds to the loading label which is also initialized, configured with some parameters and added as sub view to the loading view. At last, the loading view containing the activity indicator view and the loading label is added as sub view to the super view of the view controller (in our case RootViewController).
3) Now start the activity indicator by implementing

[activityView startAnimating];

at the point of the implementation class where the data processing or loading is starting. When the processing or loading job is done, stop the activity indicator animation and remove the activity indicator view from super view by implementing

[activityView stopAnimating];
[loadingView removeFromSuperview];

4) Last but not least, import QuartzCore class into view controller’s implementation class.

#import "QuartzCore/QuartzCore.h"

That’s it! Now, build your app and go to the result showed in the image above 😉

iOS Dev: Implementation of an ActivityIndicatorView

Loading webpages or big data usually needs some time. An ideal tool to show the user data is processing in the background is to implement the ActivityIndicatorView feature. This really short tutorial shows how to implement this useful feature.

1)  Declare a UIActivityIndicatorView instance in the interface class of the view controller you want to implement such an activity indicator view (in our example RootViewController.h).

@interface RootViewController : UIViewController {
    UIActivityIndicatorView * activityView;
}

@property (nonatomic, retain) UIActivityIndicatorView * activityView;

2) Next, implement the following code into body of method viewDidLoad of the implementation class (RootViewController.m).

- (void)viewDidLoad {
    [super viewDidLoad];
    activityView = [[[UIActivityIndicatorView alloc] initWithActivityIndicatorStyle:UIActivityIndicatorViewStyleGray] autorelease];
    activityView.frame = CGRectMake(0.0, 0.0, 35.0, 35.0);
    activityView.center = self.view.center;
    [self.view addSubview:activityView];
}

The code above initializes the activity indicator view, sets its size, aligns it and adds it as sub view to the view controller’s view. As an alternative you can also use UIActivityIndicatorViewStyleWhite or UIActivityIndicatorViewStyleWhiteLarge as activity indicator style instead of UIActivityIndicatorViewStyleGray.

3) Now insert

[activityView startAnimating];

before your loading process is starting. When the process is finished (e.g. after requesting all data from a server) insert

[activityView stopAnimating];

which stops the activity indicator view and the super view shows up.

iOS Dev: Convert Hex to Binary

A recursive way to convert a hex to binary:

NSString *hexValue = @"1F";
NSUInteger hexInteger;

[[NSScanner scannerWithString:hexValue] scanHexInt:&hexInteger];
NSString *binaryValue = [NSString stringWithFormat:@"%@", [self convertToBinary:hexInteger];

(NSString *)ConvertToBinary:(NSUInteger)inputValue
{
      if (inputValue == 1 || inputValue == 0)
              return [NSString stringWithFormat:@"%u", inputValue];
              return [NSString stringWithFormat:@"%@%u", [self convertToBinary:inputValue / 2], inputValue % 2];
}

iOS Dev: How to view image from url and resize it?

Images from webservices or servers are not always available in the appropriate size. I figured out a way to resize images without much loss of quality and how to view them by using the orginial url.

CGSize size = CGSizeMake(100, 100);
NSString *imageUrl = [@"http://www.myUrl.com/" stringByAppendingString:@"myImage.png"];
NSData *receivedData = [[NSData dataWithContentsOfURL:[NSURL URLWithString:imageUrl]] retain];
preViewImage.image = [utils resizeImage:[[UIImage alloc] initWithData:receivedData] reSize:size];

And now resize the image to a given size.

- (UIImage*)resizeImage:(UIImage*)aImage reSize:(CGSize)newSize;
{
      UIGraphicsBeginImageContext(newSize);
      [aImage drawInRect:CGRectMake(0,0,newSize.width,newSize.height)];
      UIImage* newImage = UIGraphicsGetImageFromCurrentImageContext();
      UIGraphicsEndImageContext();
      return newImage;
}

iOS Dev: How to implement a Splash Screen (Default and Customized)?

This tutorial shows how to implement a splash screen on the start of an application. There are two ways to do so: A very simple standard way that shows the splash screen only four some millisecondes and another way in where you can determine the desired splashing time.

SDK Default:

This way is an already implemented feature in the SDK. All what you have to do, is to create a splash screen image named Default.png (name it exactly this way)  and put it in your Resources folder of your project. That’s it! On the next application start, the splash screen shortly appears before the root view is shown.

Indeed, it’s a very short splashing time and often app developers want to show up the splash screen for longer time. This case needs a custom implementation. Let’s do it!

Implementation with custom splash screen timer:

1) Create a new view controller. Let’s name it SplashViewController that inherites from UIViewController. You don’t need to implement anything in the interface and implementation class.

2) Create a new nib file. Let’s name it SplashView. Open it with the Interface Builder and add a ImageView to the view. Then, assign a image you want to have for the splash screen to the image view (Inspector -> Attributes -> Image View -> Image).

3) Now, let’s add some code to the app delegate interface class first, so it looks like the example below:

@class SplashViewController;

@interface MyAppDelegate : NSObject <UIApplicationDelegate> {
     UIWindow *window;
     UINavigationController *navigationController;
     SplashViewController *splashViewController;
}

@property (nonatomic, retain) IBOutlet UIWindow *window;
@property (nonatomic, retain) IBOutlet UINavigationController *navigationController;
@property (nonatomic, retain) IBOutlet SplashViewController *splashViewController;
@end

The only thing you have to do is to specify your splash view controller and add a property. Don’t forget to import SplashViewController by using @class.

4) Next, synthesize the splashViewController variable in your implementation class and extend the class by the following code:

-(void)applicationDidFinishLaunching:(UIApplication *)application {
     splashViewController = [[SplashViewController alloc] initWithNibName:@"SplashView" bundle:nil];
     [window addSubview:splashViewController.view];
     [window makeKeyAndVisible];
     [NSTimer scheduledTimerWithTimeInterval:1.5f target:self selector:@selector(onSlashScreenDone) userInfo:nil repeats:NO];
}

Initialize the splash view controller and add it as subview to the main window. Define your desired splash screen time with scheduledTimerWithTimeInterval:2.0f (2.0 is 2 seconds).
Further, add the following method to the class:

-(void)onSlashScreenDone{
     [splashViewController.view removeFromSuperview];
     [window addSubview:[navigationController view]];
     [window makeKeyAndVisible];
}

The method onSlashScreenDone is called when the timer was expired. It removes the splash view controller and adds the follow up controller as subview and make it visible (in our example, a navigation controller).

That’s it! Build your app and enjoy! 🙂

iOS Dev: Add TabBar to a View without a TabBarController

There are cases where a tab bar must be implemented without using a tab bar controller. For instance, if a navigation controller is used, it is laborious to let a navigation controller work together with a tab bar controller. The more convenient way is to add a tab bar on the top of a view without applying a tab bar controller.

This short tutorial shows how to implement such a tab bar having two tabs.

1) Add a tab bar to your view over the Interface Builder and add as many tab items as you want.

2) Assign to each tab item a unique tag number over the Inspector window (i.e. tab 1 gets 1, tab 2 gets 2…and so on).

3) Delegate the tab bar with the File’s Owner.

4) Add the following code to the interface class of your view:

@interface MyViewController : UIViewController <UITabBarDelegate> {
     UITabBar *mainTabBar;
     UIViewController *tab1vc;  // view controller of first tab
     UIViewController *tab2vc;  // view controller of second tab
}

@property (nonatomic, retain) IBOutlet UITabBar *mainTabBar;
@property (nonatomic, retain) UIViewController *tab1vc;
@property (nonatomic, retain) UIViewController *tab2vc;

It is important to add the <UITabBarDelegate> after the UIViewController. If you want to have more tabs, just adapt the number of UIViewController *tabXvc elements as you like.

5) Create for each UIViewController you have declared an own xib file using the Interface Builder and the corresponding view controllers. In our example, we created the xibs MyFirstTabView and MySecondTabView and their corresponding controllers MyFirstTabViewController and MySecondTabViewController. Then, connect each xib with its corresponding view controller over the Interface Builder.

5) Next, add the following code to the implementation class of your view:

#import "MyFirstTabViewController.h"
#import "MySecondTabViewController.h"

@implementation MyViewController

@synthesize tab1vc;
@synthesize tab2vc‚;
@synthesize mainTabBar;
.
.
.
- (void)tabBar:(UITabBar *)tabBar didSelectItem:(UITabBarItem *)item {
     switch (item.tag) {
         case 1:
              if (tab1vc == nil) {
                    self.tab1vc =[[MyFirstTabViewController alloc] initWithNibName:@"MyFirstTabView" bundle:nil];
              }
              [self.view insertSubview:tab1vc.view belowSubview:mainTabBar];
              [tab1vc release];
              break;
         case 2:
              if (tab2vc == nil) {
                    self.tab2vc =[[MySecondTabViewController alloc] initWithNibName:@"MySecondTabView" bundle:nil];
              }
              [self.view insertSubview:tab2vc.view belowSubview:mainTabBar];
              [tab2vc release];
              break;
         default:
              break;
    }
}
.
.
.

The didSelectItem method is called on a tab click and opens the corresponding view assigned to a tab tag.

6) Last but not least, connect the tab bar with mainTabBar element on File’s Owner by using the Interface Builder.
Now build it and enjoy the result! 🙂